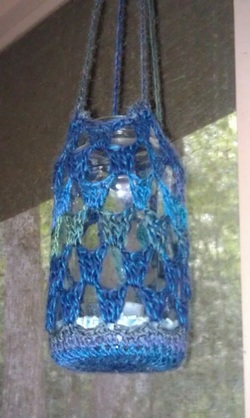
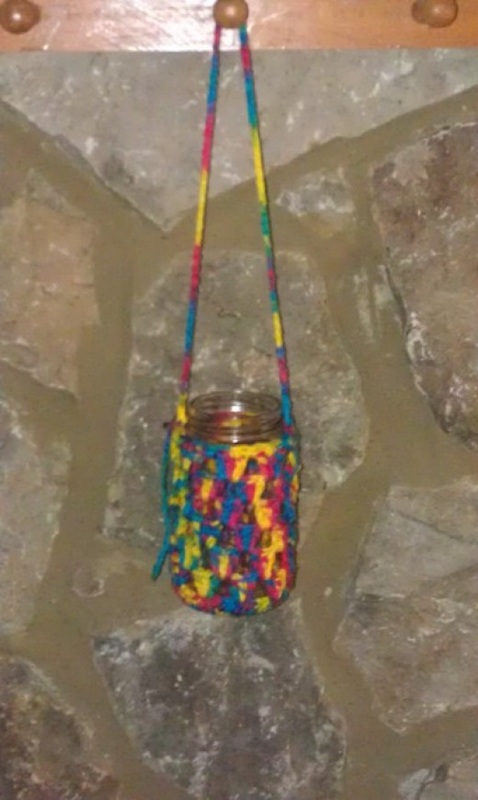
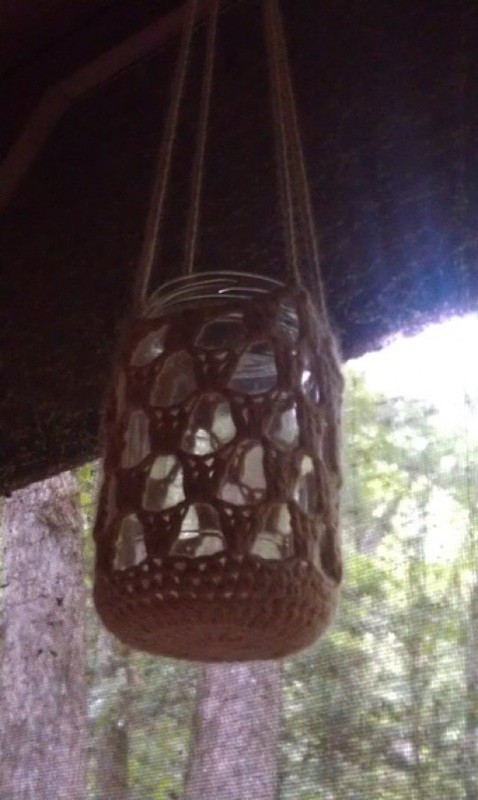
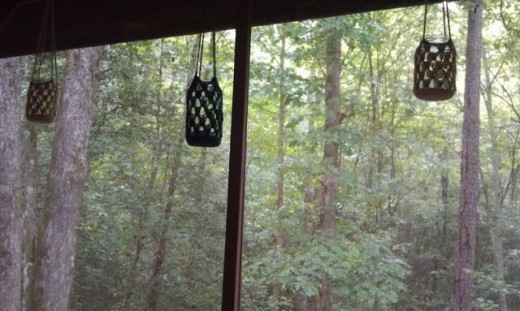
Crochet your own hanging lantern using this free pattern. A tea light candle inside cast a romantic glow or simply use to store things and more.
You will need:
cotton or acrylic yarn (for this tutorial I am using Red Heart Classic in Starbright).
Size H/5.0 hook
The base is the first part of the jar jacket you will complete, start from the bottom work your way up. Here is also where you will do your adjusting to fit your jar that you have choosen. In my pics I used old pickle jars and spaghetti sauce jars, and for the tutorial a smaller banana pepper jar.
This project is completed in rounds, you will join with slip stitch at the end of each round.
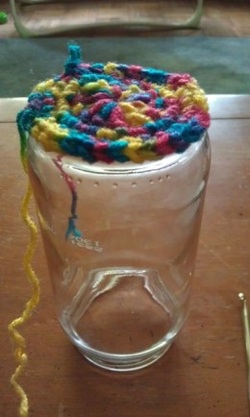
Chain 4, sl st in first chain to form a ring
Round 1: 12 dc in ring, sl st to top of first dc to join. Pull tail tight to close the ring.
Round 2: Chain 1, here we begin to increase- so you will need to do 2 sc in each dc stitch. Sl st in chain 1 to join. You should have 24 total sc stitches.
Round 3: Increasing again- Chain 1, 2 sc in next stitch, then 1 sc. You will continue with 2 sc,1 sc till you complete the round and sl st to chain 1. You should have 36 total sc stitches.
Line up your base with the bottom of your jar to see how you are doing, I am satisfied with my base of the crocheted hanging lamp so I am not increasing anymore. If not, continue increasing till yarn covers the base of the jar and then do one round of same amount of stitches.
Round 4: Chain 1, sc in each stitch around for 36 stitches, sl st to join and move on to crocheting the sides of the jar jacket, see below pictures.
You will need:
cotton or acrylic yarn (for this tutorial I am using Red Heart Classic in Starbright).
Size H/5.0 hook
The base is the first part of the jar jacket you will complete, start from the bottom work your way up. Here is also where you will do your adjusting to fit your jar that you have choosen. In my pics I used old pickle jars and spaghetti sauce jars, and for the tutorial a smaller banana pepper jar.
This project is completed in rounds, you will join with slip stitch at the end of each round.
Chain 4, sl st in first chain to form a ring
Round 1: 12 dc in ring, sl st to top of first dc to join. Pull tail tight to close the ring.
Round 2: Chain 1, here we begin to increase- so you will need to do 2 sc in each dc stitch. Sl st in chain 1 to join. You should have 24 total sc stitches.
Round 3: Increasing again- Chain 1, 2 sc in next stitch, then 1 sc. You will continue with 2 sc,1 sc till you complete the round and sl st to chain 1. You should have 36 total sc stitches.
Line up your base with the bottom of your jar to see how you are doing, I am satisfied with my base of the crocheted hanging lamp so I am not increasing anymore. If not, continue increasing till yarn covers the base of the jar and then do one round of same amount of stitches.
Round 4: Chain 1, sc in each stitch around for 36 stitches, sl st to join and move on to crocheting the sides of the jar jacket, see below pictures.
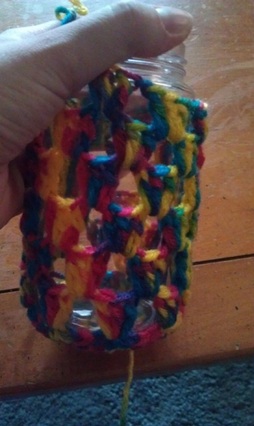
Sides of the jar:
This part is going to alternate between rounds one and two. When you are constructing the sides of the hanging lamp, you will also join rounds...its a fairly simple combination of 3dc,ch 1 pattern.
Round 1: after sl st to join last sc in the base, ch 3 and 2dc in same stitch, chain 1 and skip 3 stitches. *3dc, chain 1, and skip 3 stitches continue around ending with a chain 1 and join with a sl st in top of 1st chain of your chain 3.
Round 2: this is basically the same but you will alternate, so after you sl st and join into the top of your chain of 3 you will chain 4 (this will count as your last dc and one chain). In the next chain 1 space you will 3 dc and then chain 1 over top of the 3 dc in your row 1. continue around.
Continue alternating between rounds 1 and 2 till sides of jar are covered.
Now to finish the jar and make the jacket fit nice and snug, I do a sc decrease in the 3 dc spots and then a sc in chain one space. You end up skipping a dc in the 3 dc cluster. Finally slst to beginning stitch and then if you want chain about 75-80 and slst to other side. :) You are done. Fast and easy pattern that can be adjusted to fit any jar or container. :) Melody

 RSS Feed